The Best Way to Enlarge Photos in Photoshop*
No matter how many megapixels we have, it never seems to be enough. I have just started playing with a process that retains more detail than Photoshop’s “Automatic” process for resizing images, and very slightly more detail than using Photoshop’s “Bicubic” process for resizing images in PS.
It is not a trick that will magically find hidden detail in your images but it will retain and maximise the detail that does exist. You may find that this very slight improvement is not worth the extra effort involved, but if you are the kind of person that strives to get the most out of your images, then please read on.
How Digital Images are Enlarged
Basically this whole post is a long winded way of saying that all I am doing is using a different type of image resampling called Lanczos, that isn’t available within Photoshop. You could select “Bicubic Smoother” within PS when enlarging which should yield a better result than the “Automatic” setting, but Lanczos appears to retain a little bit more detail again and in theory is generally considered to be the best. There are a handful of third party applications that make use of Lanczos resampling. I have not yet tested many of them out but the one I have tested, Irfan View, is free and does see an improvement over the options available in PS.
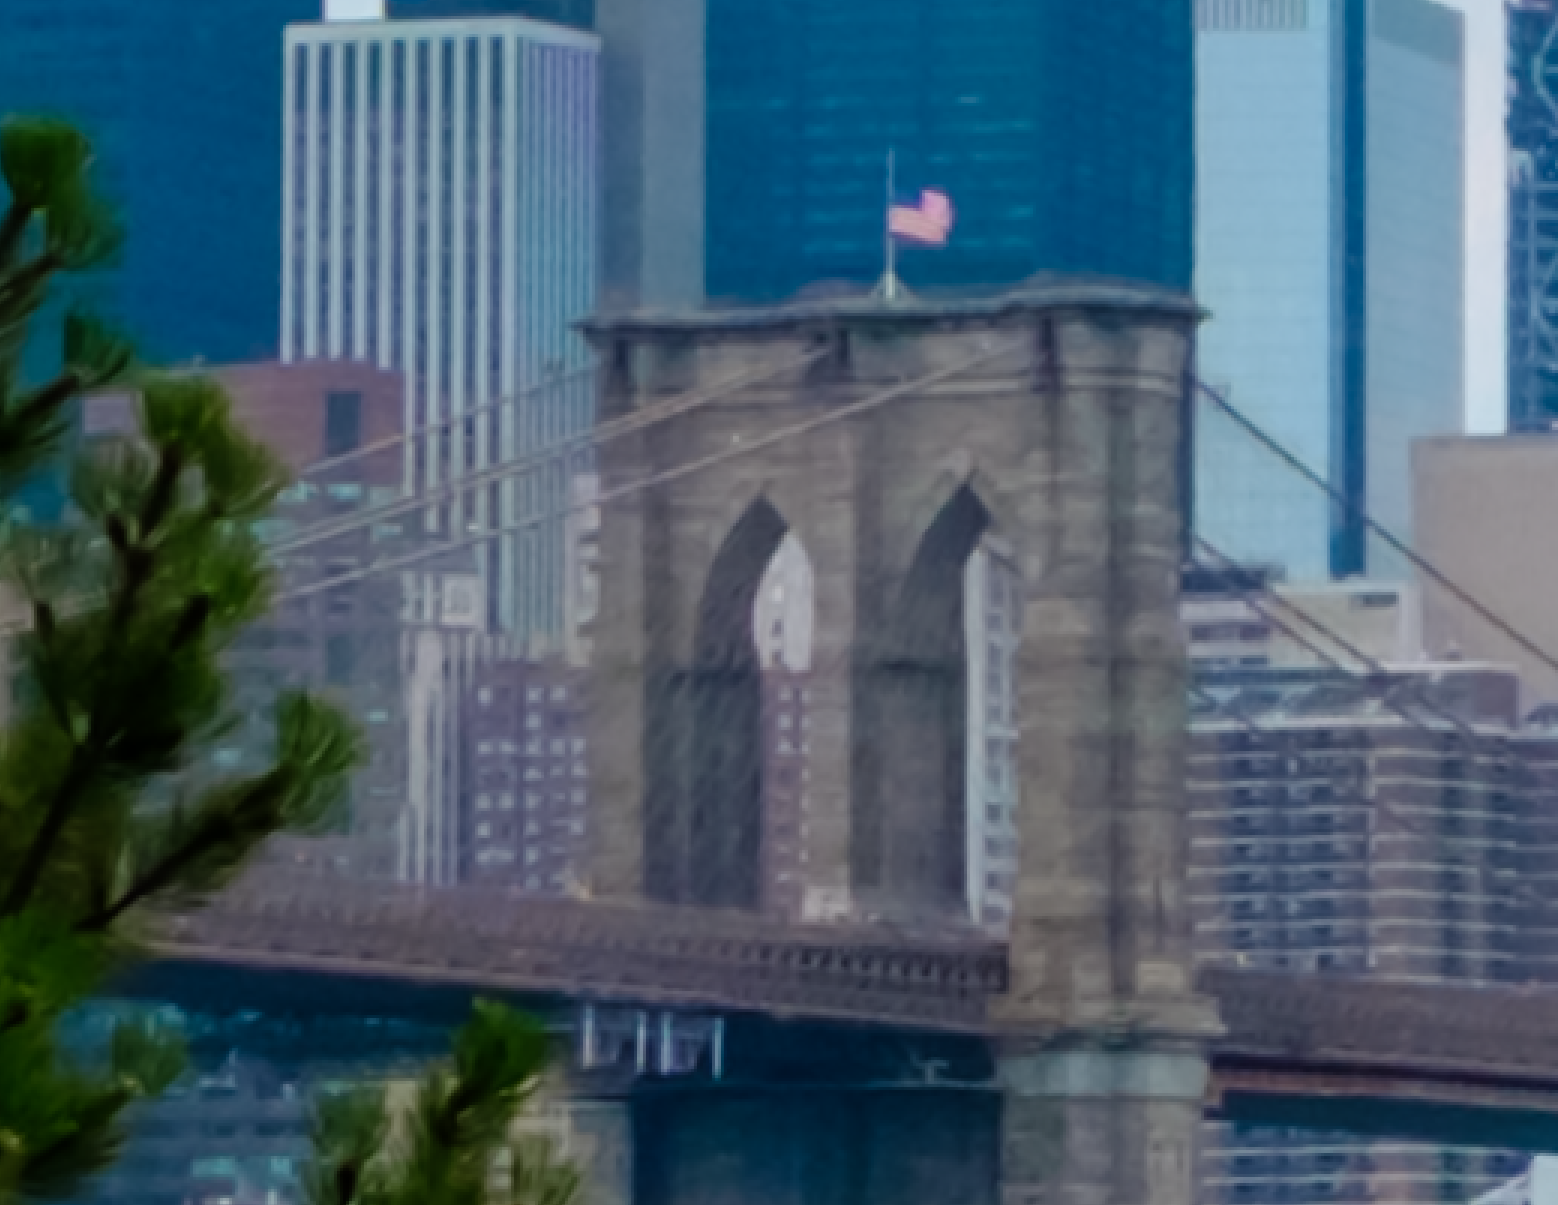
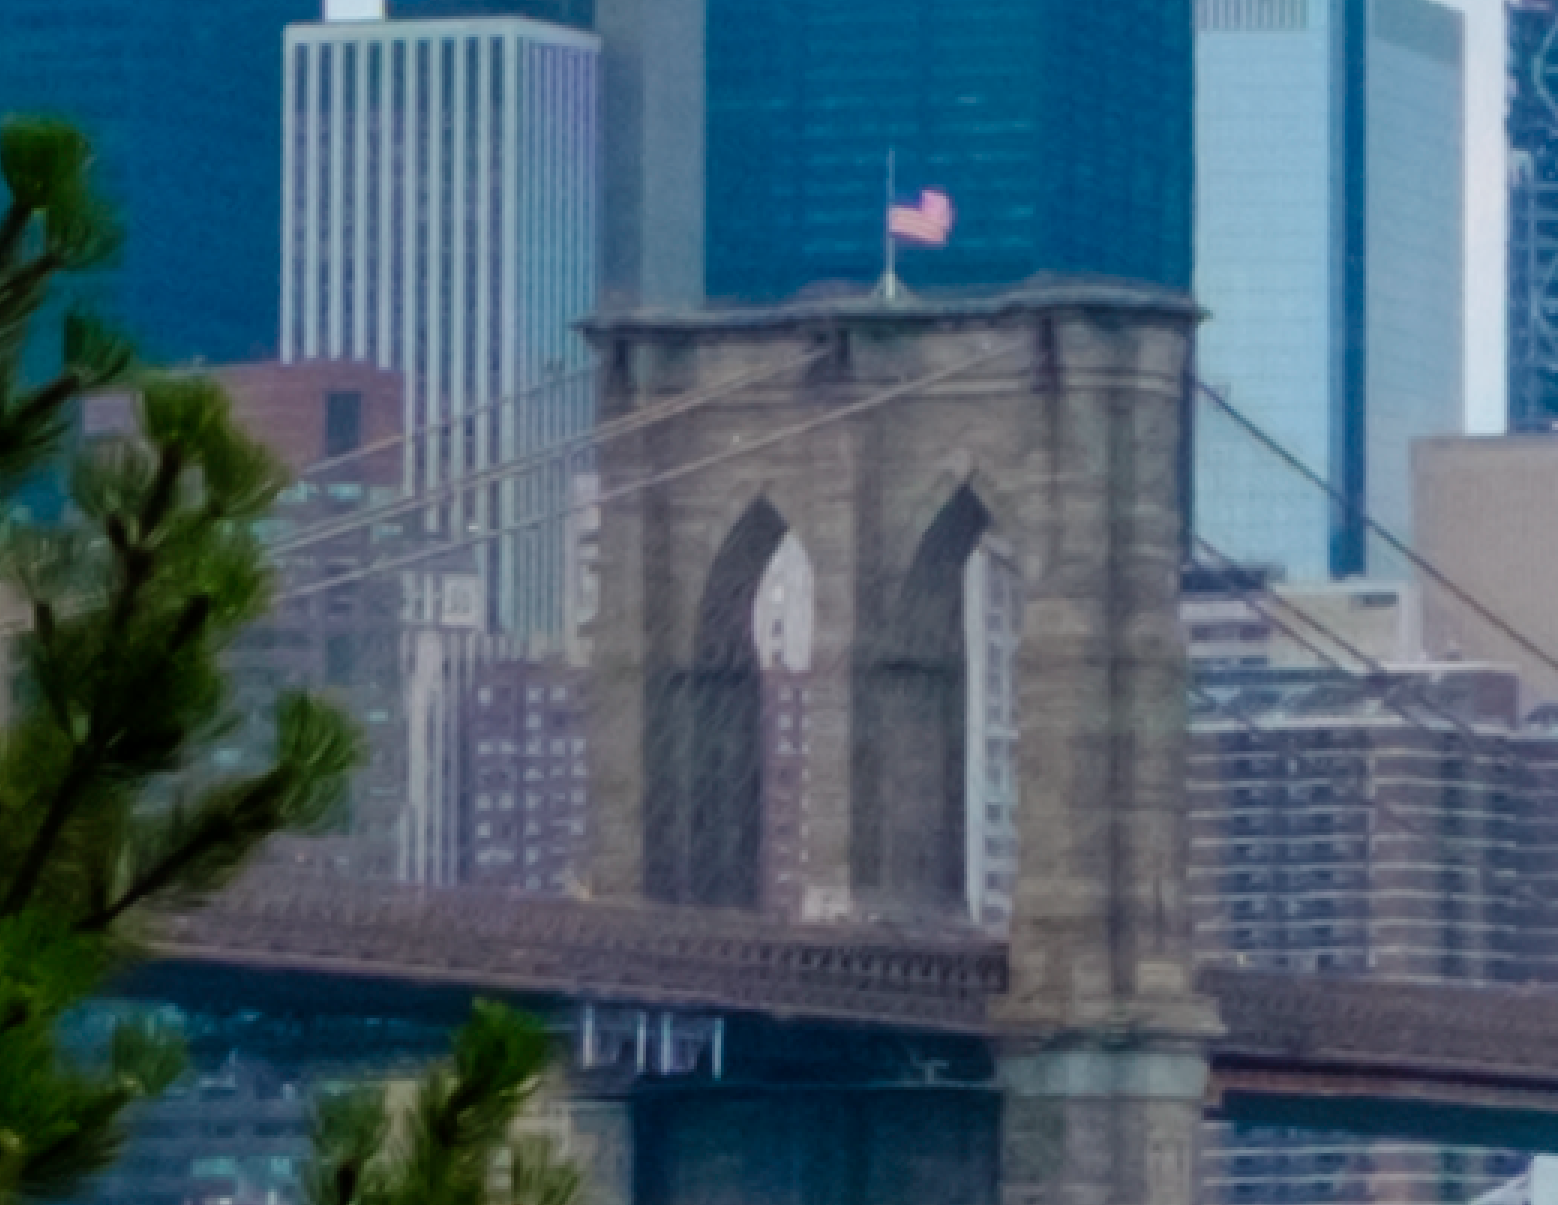
300% Crop
BEFORE (resized in PS with the “automatic” setting) – AFTER (resized in Irfan View)
[or Download PSD example with layers]
Instructions
1. RAW DEVELOPING
Remove all sharpening from your RAW file and apply an appropriate amount of noise reduction as needed (usually until you can’t see any grain in the image, but keep this as low as possible to retain as much detail as possible).
Note that when removing sharpening from the RAW develop settings, you will have to reapply some sort of sharpening at a later stage. This is how I retouch all of my images even when not enlarging them for print.
2. IN PHOTOSHOP
Retouch your image to completion as you normally would (still without applying any sharpening).
Save a PSD or TIFF (or another loseless codec that will work in the 3rd party app)
3. IRFAN VIEW (Download Free)
Open the saved file in Irfan View
Go to Image – Resize/Resample
Make sure resample mode is set to “lanczos (slowest)” and input your new image size/dimensions you want to resize to.
Save as a TIFF file (without any compression)
4. BACK IN PHOTOSHOP
Open the resized TIFF in PS and apply your sharpening to your enlarged file
**Note you may want to increase the radius of your sharpen inline with your image size. I.e. if you normally sharpen with a radius of 3px and you have enlarged the image 150%, you may want to sharpen at 4.5 pixels. This of course will also depend on the final size and intended viewing distance of your print, but that is getting a little beyond the scope of this article.**
You should now have the slightest bit more detail in your enlarged file. It may look a little bit like noise but you should hopefully see more texture and detail that you can utilize when printing large prints.
If you have an even better way to enlarge photos or come across any issues with the process above, please leave a comment or send me an email.
Follow me on Instagram
General Photography – @ShaunMaluga | New York Street Photography – @fujifilmxpro2


