Fujifilm X Series Tips & Tricks
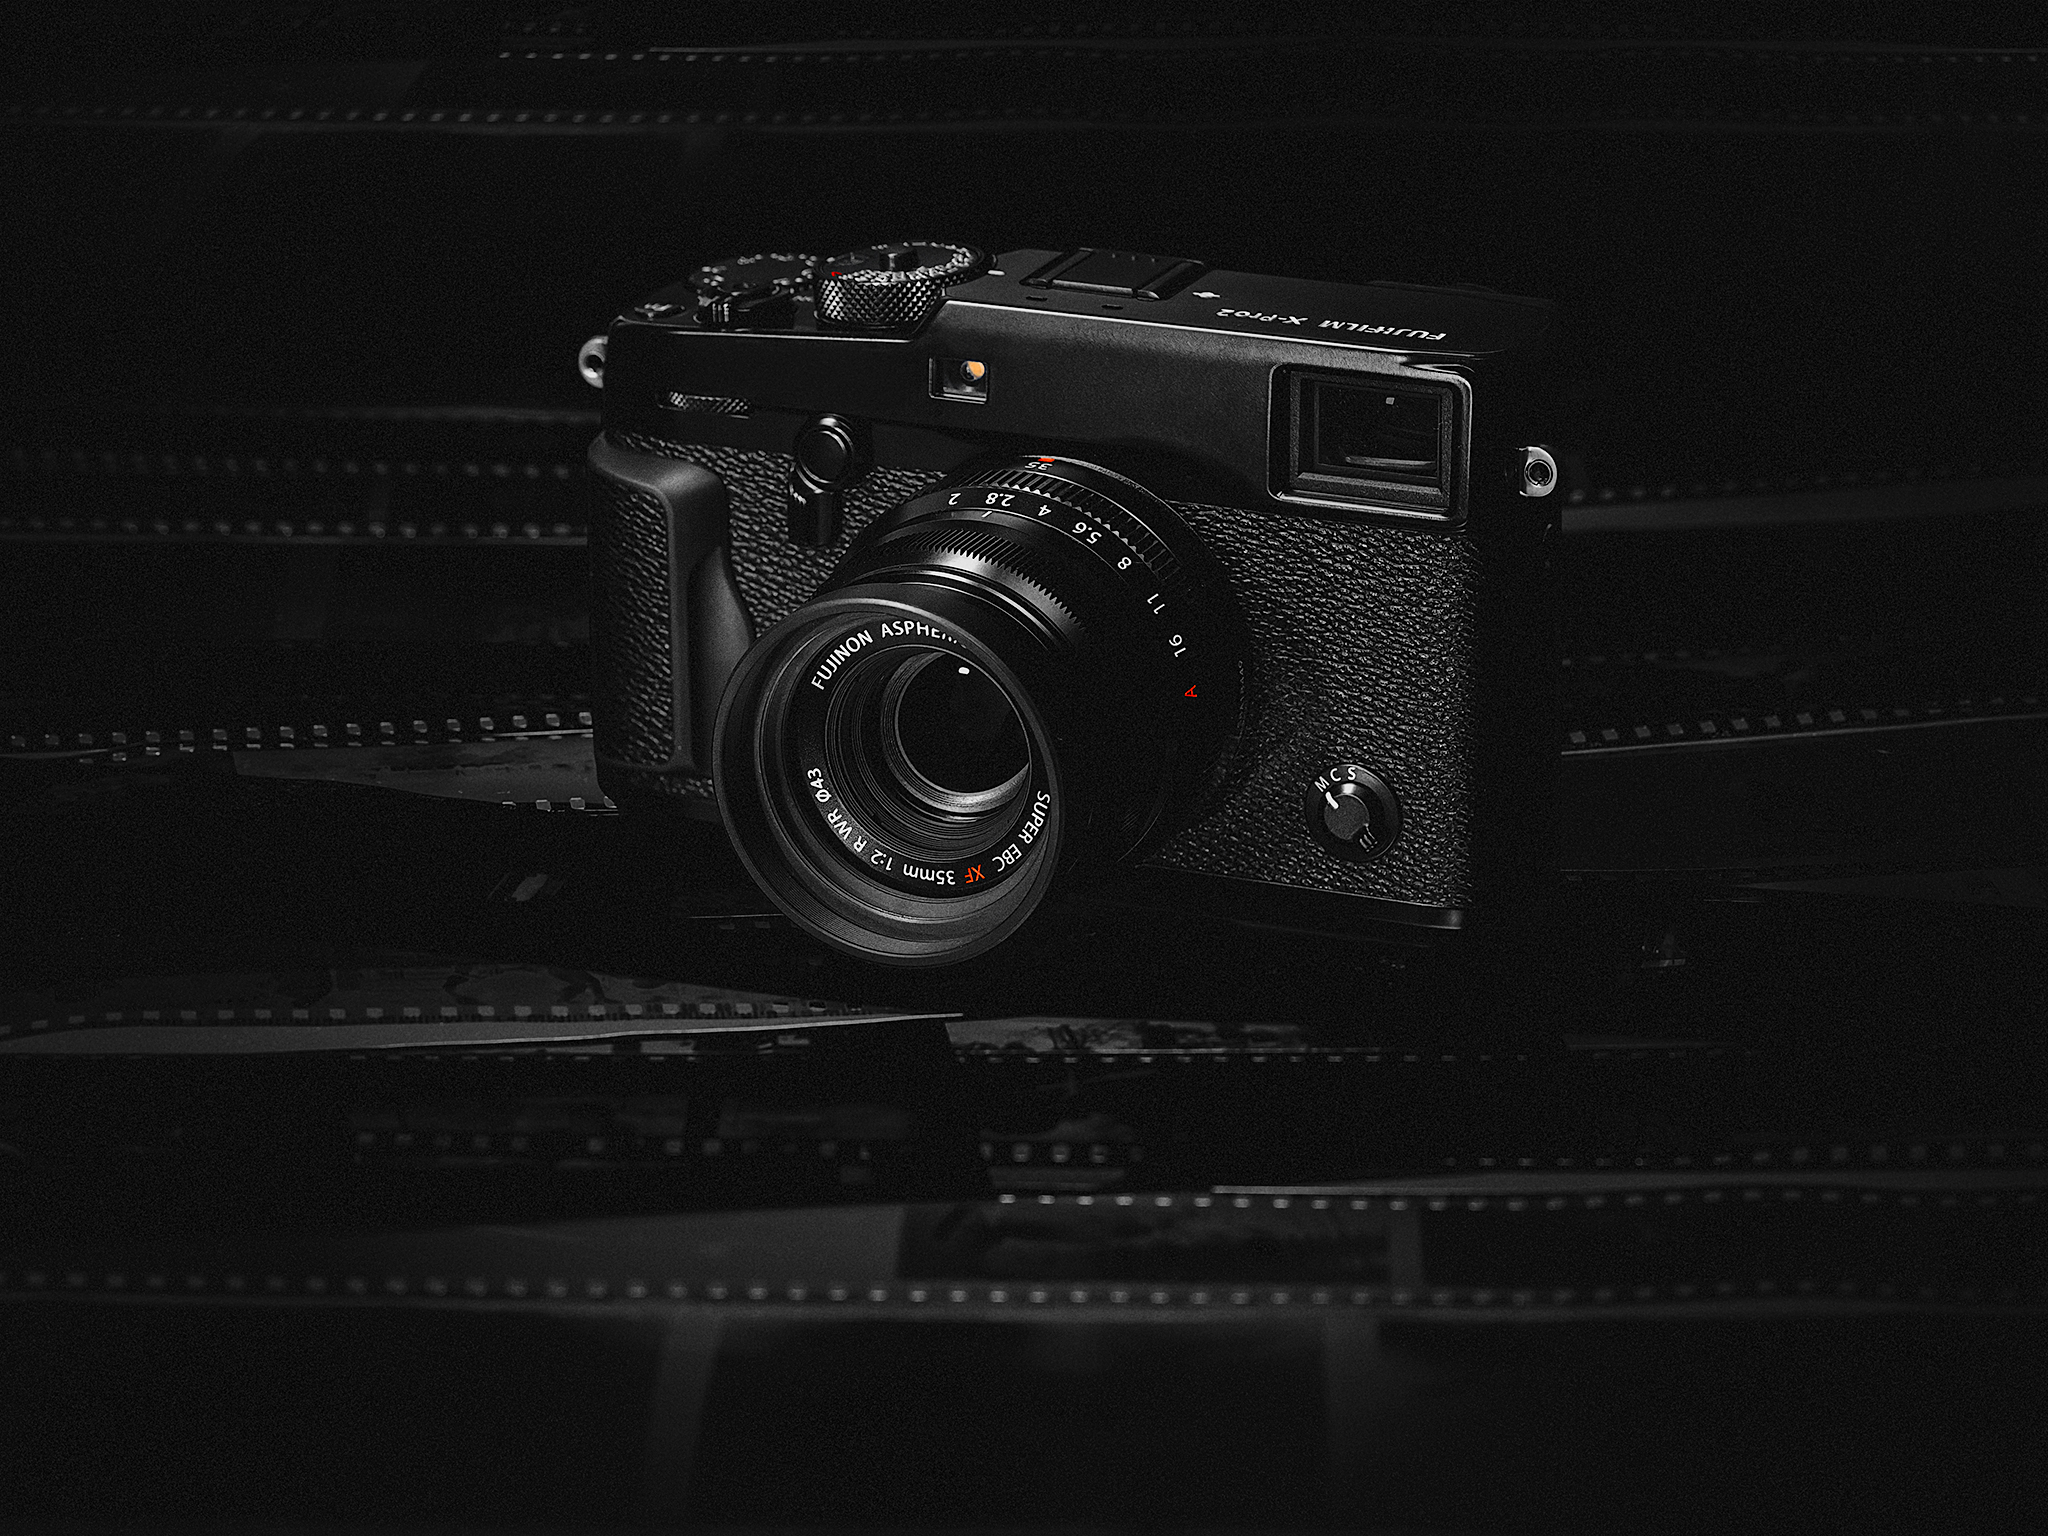
Fujifilm X-Pro2
The Fujifilm X Series Cameras are quite unique in their operation and look of the images they produce. Here are some tips I have picked up from my time with the Fujifilm X-Pro2. Most of the tips will apply to all of the X Series, but some may be more specific to the X-Pro2.
Where the X cameras really shine and beat out the competition is in their colour rendition. It is mentioned in nearly every review you read and it was the primary reason I gave Fuji a shot in the first place. The different film profiles give you more options and creativity when shooting but you will notice that if you are shooting RAW, you lose those profiles once you import them to Lightroom.
This is because Lightroom is applying it’s own Camera Calibration/colour profile by default when you import your Fuji files and is disregarding all of that hard work that Fuji has put into their colour rendition. There is no automatic way to retain the specific colour profile you chose when shooting but at the very least you can set your default profile to Provia (or whatever profile you shoot most in) so that you are at least starting from one of Fuji’s bases and not Adobe’s Standard.
To change this default setting:
Adobe keeps updating Lightroom so that it plays a bit nicer with Fuji RAW files but it is still slower than working with other camera’s files. There is not much you can do about this but here are a few tips to optimise your Lightroom performance/workflow.
If you are a Canon shooter you may have noticed that the shadow recovery in their line of cameras is quite miserable and you get a much better result if you overexpose your image and then recover the highlights in post. The Fuji X cameras seem to be the opposite and work much like Leica’s (and maybe Sony & Nikon?) in that the shadows are quite forgiving but recovering highlights doesn’t appear to be as smooth. Thus, you are better underexposing with the intent to save the highlight information and then recover the shadows in post. Of course, there is an extent to how far you can push the shadows, but you will have much more room for movement if you shoot to the left. You don’t need to underexpose the image completely, just enough that any highlights are not clipping/blowing out.
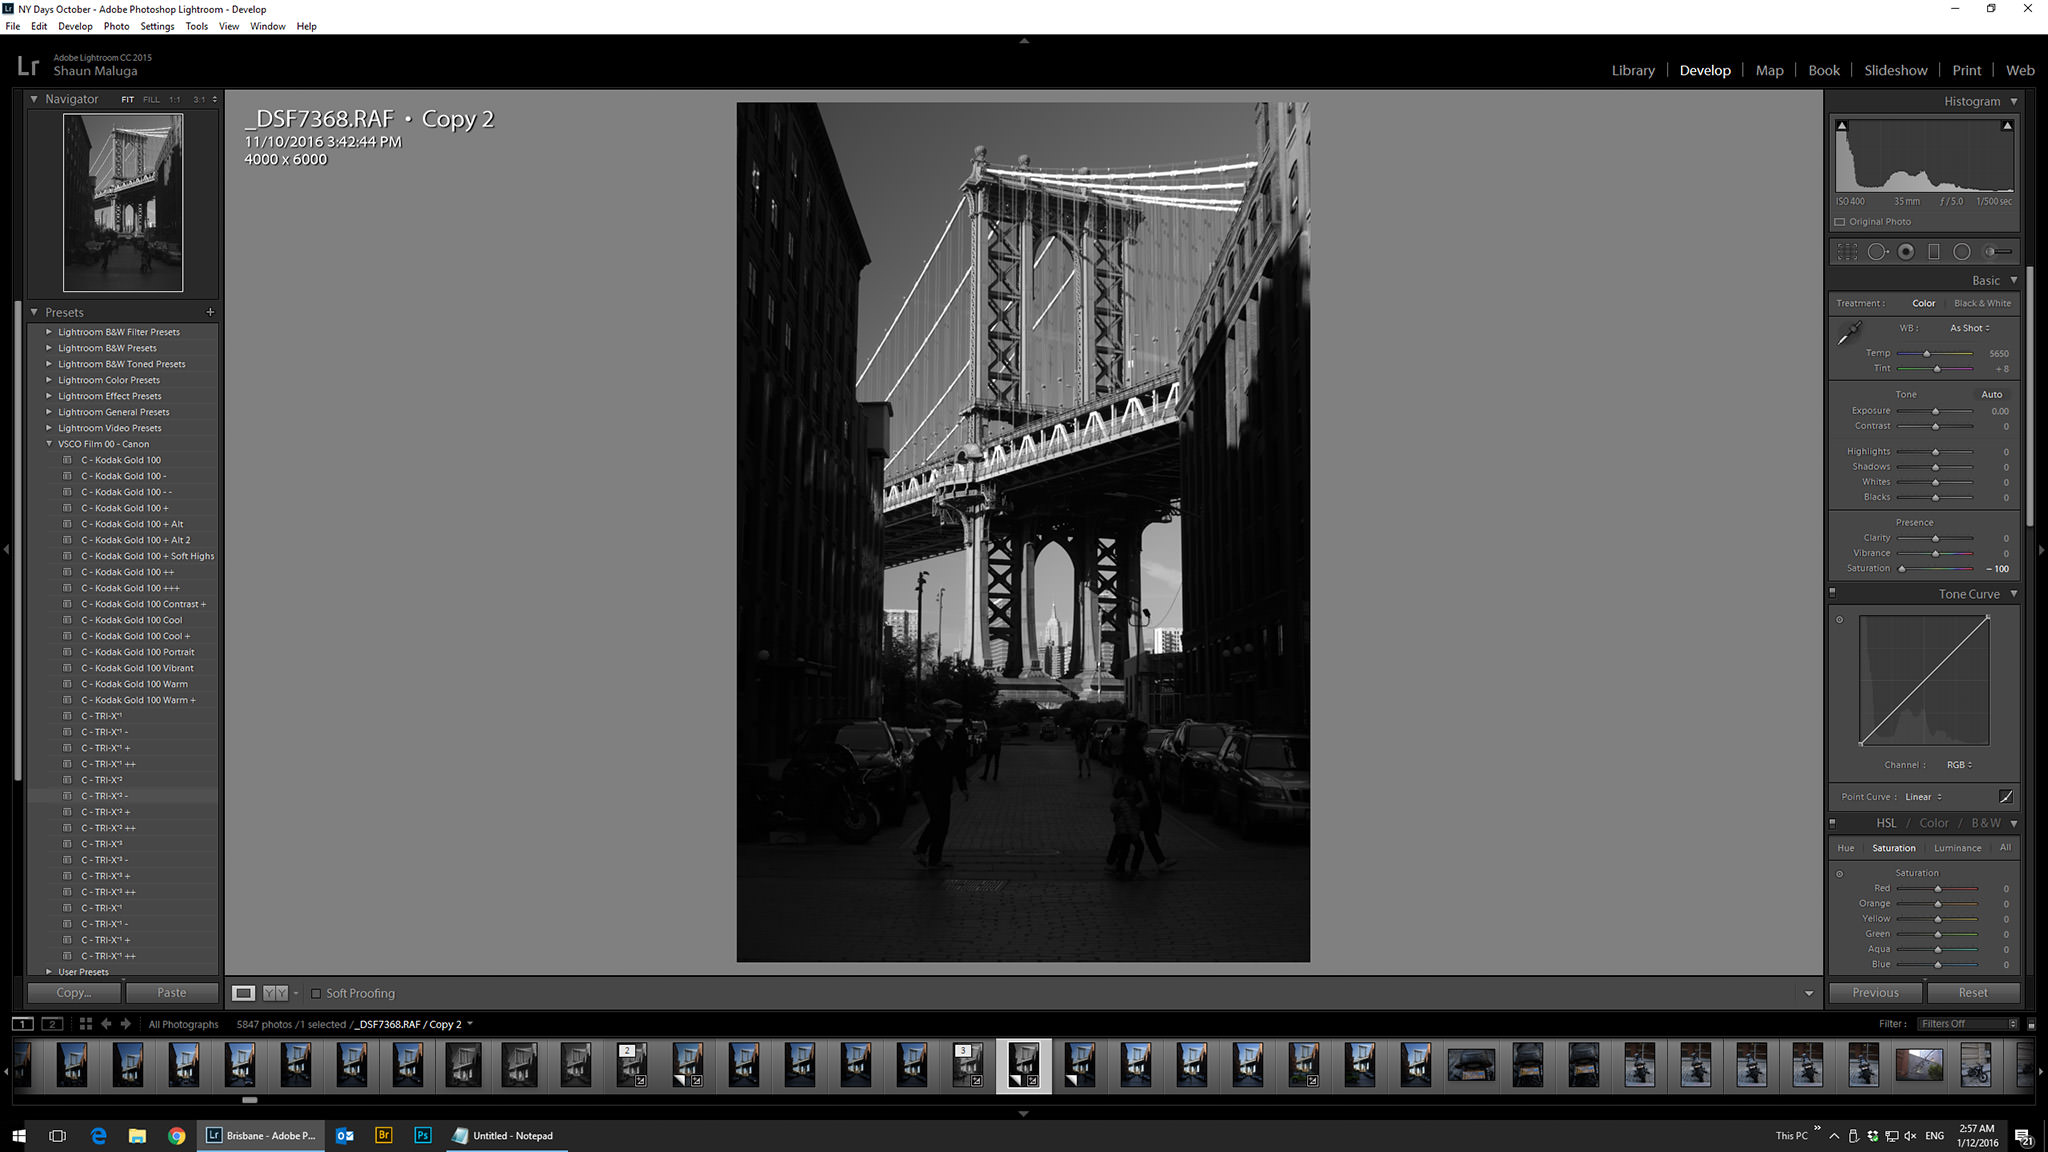
Shoot to the left (or expose to keep detail in the highlights)
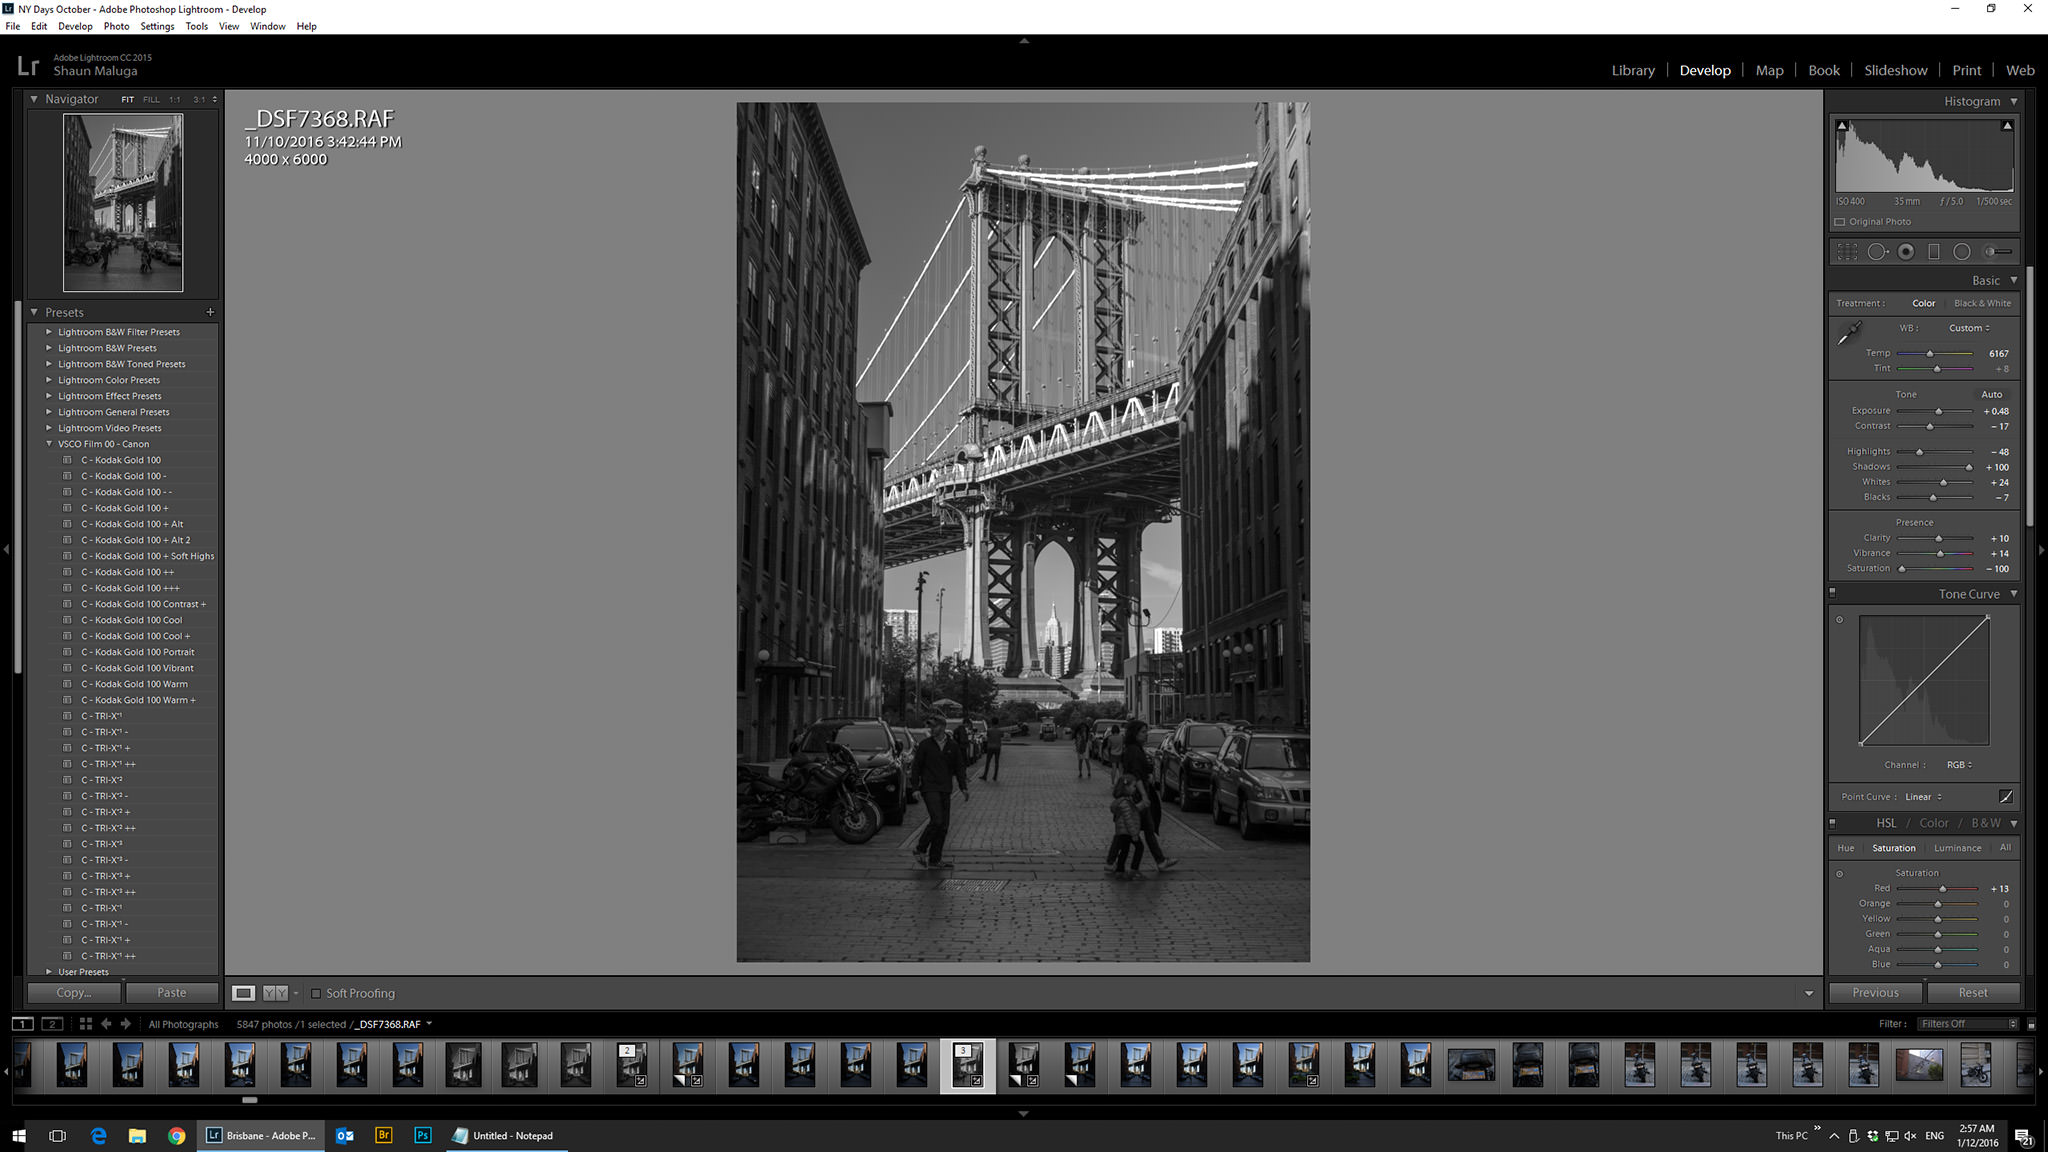
Although extreme in this example, you can see that the shadow recovery is quite forgiving.
Classic Chrome is a nice desaturated and subdued vintage look that shifts the cooler colours more into the cyan range. But you don’t always have to use this profile for that desaturated washed out look. You can push up the vibrance and saturation to bring these colours back to a more “normal” or over saturated look and the shift toward cyan will give your files a nice little bit of flair and uniqueness.
Acros+G is a good all round black and white option but if you have really dark skin tones compared to the rest of your scene you could use Acros+R to brighten the skin which should be more in the red channel. Just make sure the skin still has detail and doesn’t look like its glowing.
When editing your files, pick your colour profile first, before doing any adjustments. Different profiles have different levels of contrast and saturation and you want to be applying the right amount of each RAW slider for whatever base you are starting with.
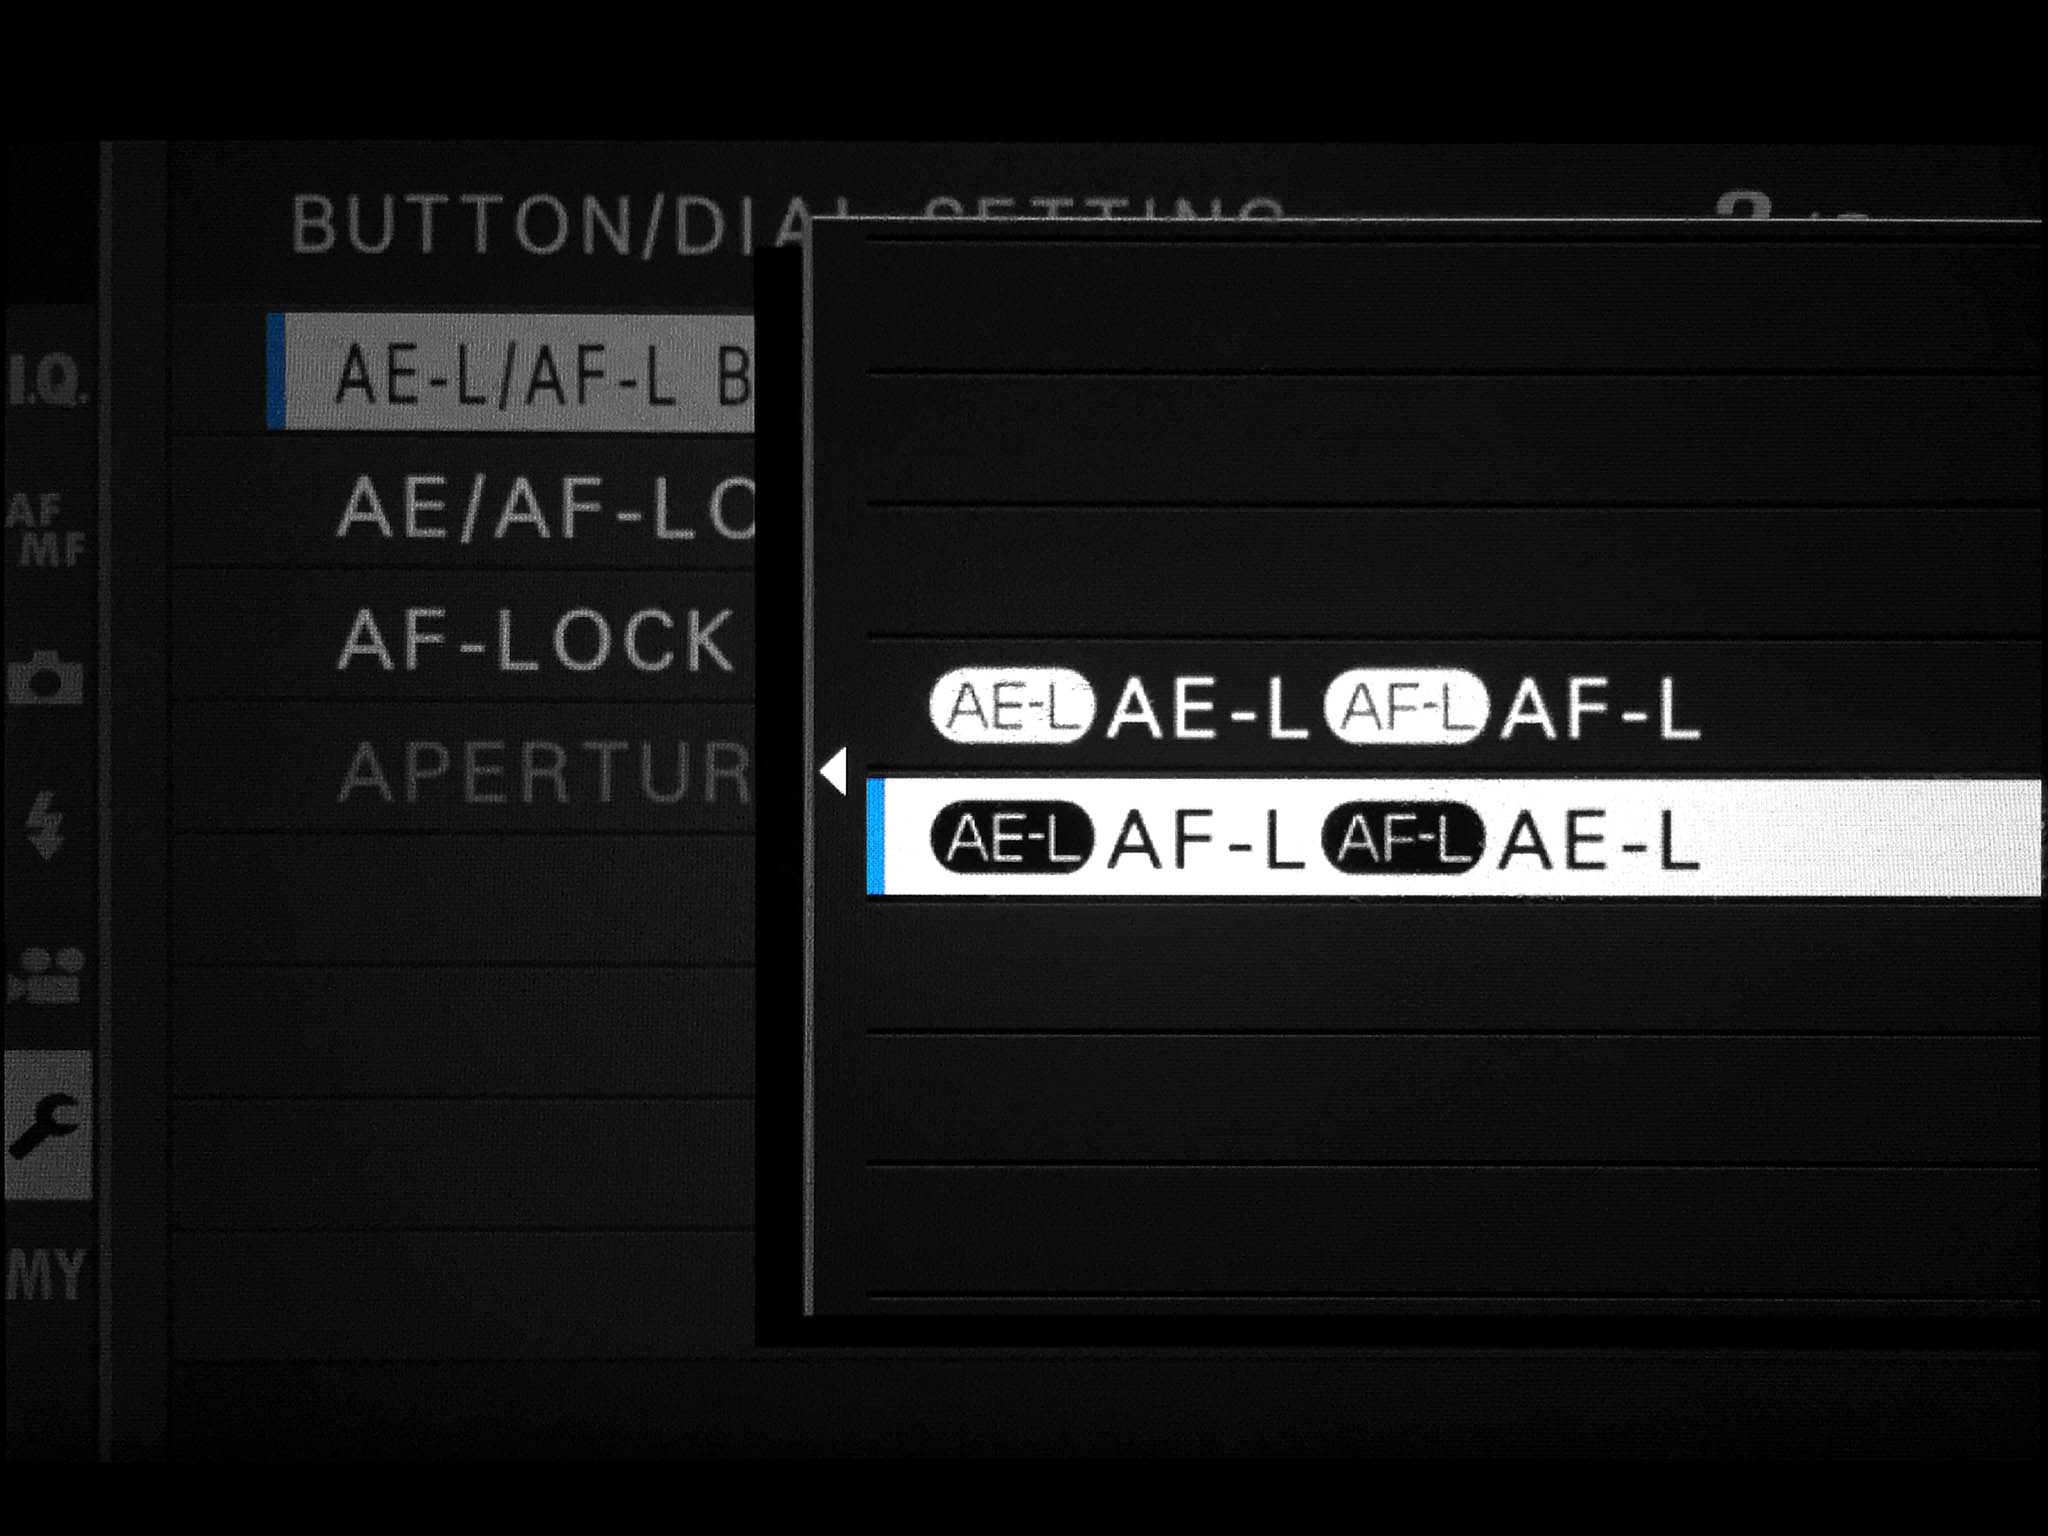
For back button focusing on the X-Pro2, the AF-L button is on the right side of the camera, directly under where you grip the camera. I find that my thumb extends past the button and does not find it naturally. I switch the AF-L function to the AE-L button which is in a better position for my thumb, even if ergonomically it is still not perfect. This may just be a personal preference as I have large hands but try out both and see what works for you.
Street photographers debate over posed vs natural photos and also asking permission to shoot a subject. For me I prefer the more natural documentation. As soon as you ask permission or someone notices that you are taking a photo of them, they change their body language/mood/expression and ruin the natural moment that was taking place.
You can get around this by hanging the camera around your neck and shooting wirelessly from your phone. Just make sure you have the focus lever set to auto before connecting to the app so that you can pick your focus point from your phone display (Fuji really needs to update their app). If you are a good enough actor and subtle enough with your camera positioning, people will assume you are just fiddling with your phone.
You can go a step further and turn on the electronic shutter if you are in close proximity or a quiet environment. This does sound and can appear creepy. Of course, always be respectful and if you get caught own up to it! Try and explain what you loved about them/the moment, be complimentary and then go about your day. Worst case scenario, if they are really unhappy about having their image taken, you can delete the photo in front of them from your first memory card and keep that duplicate copy that you shot to your second card. I’ll let you make a judgement on the moral implications of that.
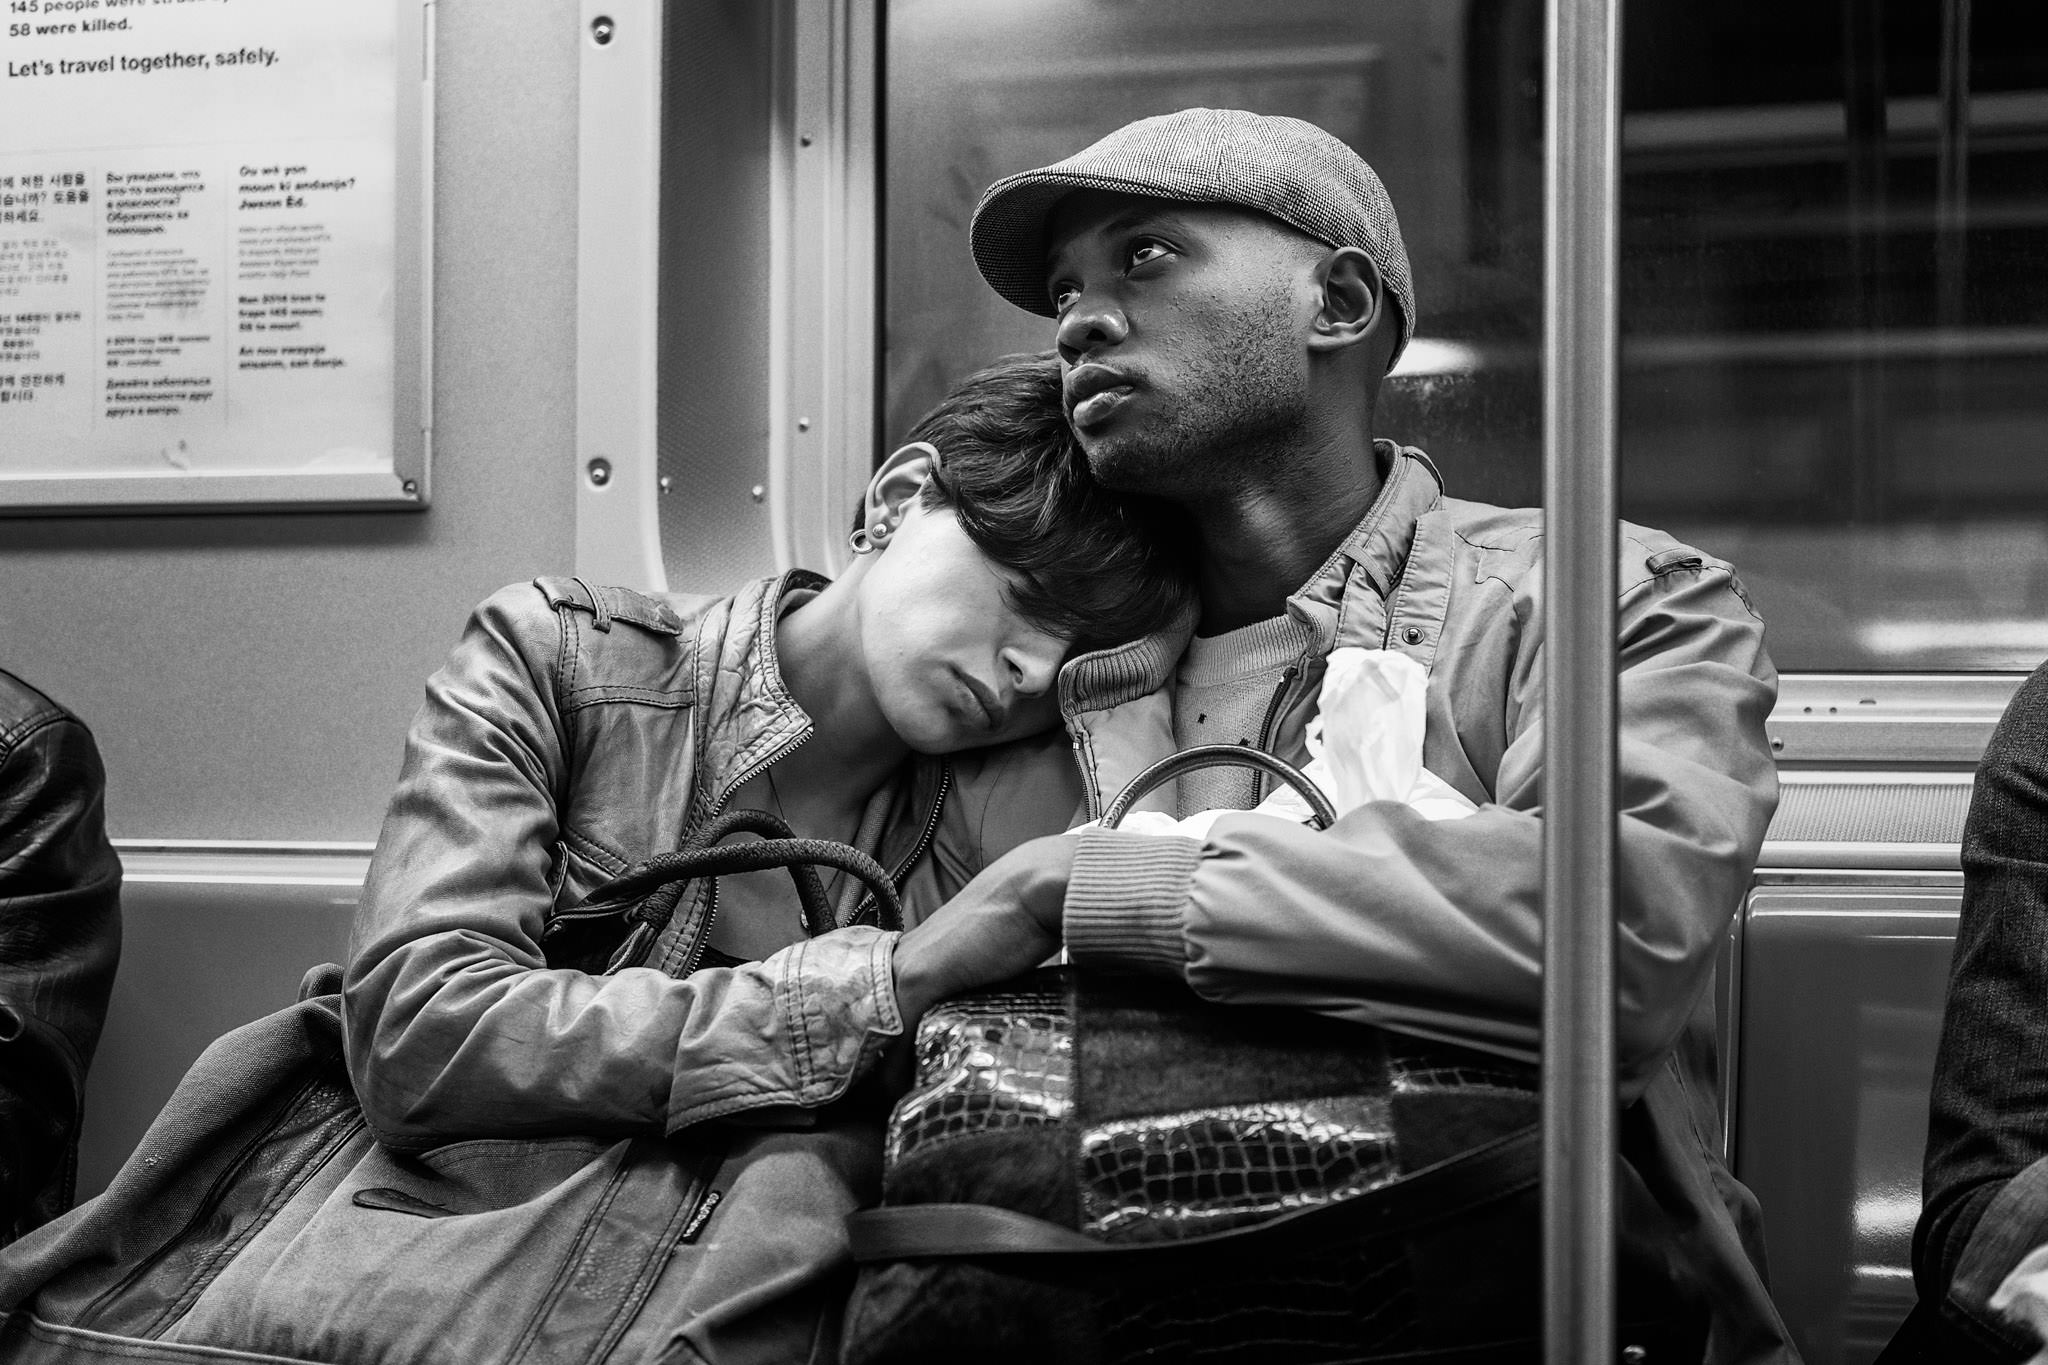
Shooting via the remote app with the camera in my lap meant that I didn’t interrupt this beautiful and natural moment.
Sharpening
The combination of Fuji’s high quality lenses and lack of anti-aliasing filters means the images come out sharper than some other camera systems. Thus, you might want to pull back on the amount you sharpen your images. For example, I typically sharpen my Canon 5d iii files (with any of the high quality prime glass) anywhere from 200-300%. For my Fuji files, I tend to stick around 150%.
Wasabi Batteries
Get the Wasabi Power Battery (2 pack). You will need as many spare batteries as you can get. Some reviews say Wasabi are perfectly fine, some say they don’t last as long as the original Fuji batteries. They are much cheaper at least.
Long(er) Exposures
The X-Pro2 is limited to 30 second exposures through the remote app/menus. You can set the shutter speed to “B (bulb)” and hold the shutter button down for up to 60 minutes but this is not ideal because of camera shake and the need for manual timing. To set timed exposures longer than 30 seconds you can use a 3rd party remote that plugs into the microphone jack hidden on the left side of the camera. I recommend the Hahnel Giga T Pro II (Canon) which does everything from simple remote release to delay and interval timing. Just plug in the receiver, set the shutter to “B (bulb)” and you are good to go.
Hahnel Giga T Pro II
Travel Tripod
You’ve downsized your camera gear so downsize your tripod too. I chose the Manfrotto BeFree over the Gitzo equivalent because I find the clip release for the legs much faster than the screw type. Note that the screw type are generally more compact though.
Manfrotto BeFree (tip: the straight black carbon fiber version is the same as the regular carbon with red trim, but $30 cheaper)
Instax SP-2 Printer
Connects wirelessly to your X Camera (or phone) and allows you to print Polaroids on the go. Great for giving out to people on the street.
Instax SP-2 Printer (Amazon)
Ona Bowery Bag
A compact and stylish bag that easily fits my X-Pro2 with 3 prime lenses, spare batteries and filters.
Ona Bowery at B&H
Faster Write and Transfer Speeds
Increase your write time and your download time with the fastest tested UHS-II memory card for the X-Pro 2. Lightroom already takes longer to import Fuji files so if you can save time in another part of the process, like transferring from card to computer, you might as well.
Lexar 2000x UHS-II (Amazon)
Some shots from my X-Pro2
Follow me on Instagram
General Photography – @ShaunMaluga | New York Street Photography – @fujifilmxpro2